

Sports Bottle Package Design in Photoshop and Illustrator
MP4 | Video: 1280x720 | Duration: 4h 36m | Language: English
In this Photoshop and Illustrator tutorial, we'll learn how to create a cool vibrant sports bottle illustration and design. We'll start with an initial composition sketch and discuss why this step is so important. Then we'll discover how to draw strong, three-color vector sports characters, from stock a photo. We'll also learn how to form detailed silhouettes from photo reference. We'll execute a render of our plastic bottle in Illustrator using the Revolve Tool before doing our final composition in Photoshop. By the end of this Photoshop and Illustrator training, you'll know how to create your own packaging designs that are ready for print. Software required: Illustrator CS6, Photoshop CS6.
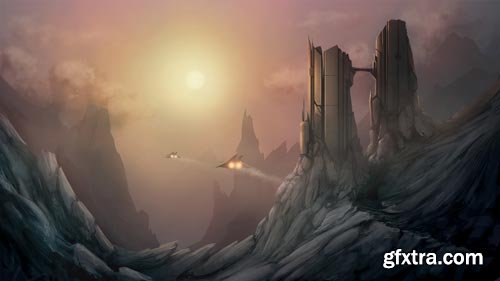
Speed Painting Environment Concepts in Photoshop
MP4 | Video: 1280x720 | Duration: 2h 27m | Language: English
When it comes to creating concept art for environments, the process doesn't have to be a slow methodical one. In fact, when we do something as simple as setting a time limit for ourselves, something truly magical can happen. Not only can we free ourselves of the burden having to create the perfect finished image in one attempt but we can also amass are large number of potential options very quickly. We will also learn that if an idea just isn't panning out, we can quickly set it aside and move on without wasting time trying to make it work. While we will be focusing on speed and staying loose early in this course, we will also learn some valuable techniques along the way for both breaking down our image as well as painting it. To wrap up this training, we will slow our pace considerably and learn that detail and polish should be saved for the very end of a speed painting. After completing this series of lessons, you will have learned more than just some tips and tricks for painting a pretty image. You will have learned that speed painting is as much a frame of mind as it is a way to work. Software required: Photoshop CS6.

Sketching Dynamic Action Poses in Photoshop
MP4 | Video: 1280x720 | Duration: 2h 19m | Language: English
Throughout the duration of this tutorial we'll be sketching six different action poses, and we'll spend a couple of lessons sketching and breaking down each pose to bring it to life. For each action pose we'll begin by visualizing any story-telling elements that might be associated with the action taking place. From there, we'll focus on sketching in lines of action to establish movement and fluidity with the form. Following this, we'll block in simple shapes to nail down the final pose. Once we've sketched our rough pose, we'll begin to sketch in additional details to build up the form and add volume. Along the way we'll discuss how we can take these additional details to push the action of the pose even further. By exploring how we can break down and sketch these action poses, you'll be able to explore sketching your own action poses with more confidence while having a lot of fun.
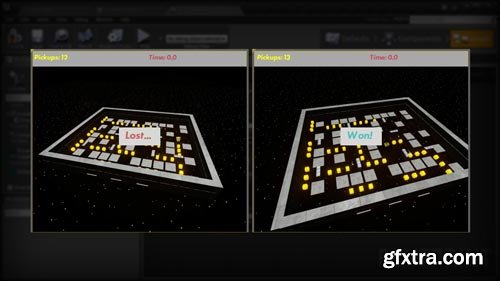
Setting up a Split Screen Multiplayer Game in Unreal Engine
MP4 | Video: 1280x720 | Duration: 3h 22m | Language: English
Throughout this Unreal Engine tutorial, we'll learn how to setup a local split screen multiplayer game in Unreal Engine 4. We'll learn best practices for setting up user interfaces for multiple players, and how to determine game state outcomes involving multiple players. By the end of this Unreal Engine training, you'll gain an understanding of how to setup a local multiplayer split screen game, and will learn pitfalls that can be avoided when designing the User Interface for a game that utilizes local split screen multiplayer. Software required: Unreal Engine 4.5.1.
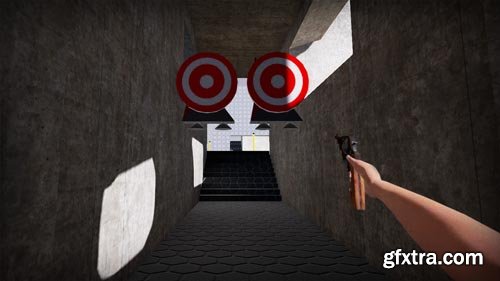
Scripting a 1st Person Assault Course in Unreal Engine
MP4 | Video: 1280x720 | Duration: 4h 35m | Language: English
Throughout these lessons viewers will learn how to use Blueprint to script some of the core tenants of a first or third-person shooter. We'll use line traces to simulate a high-velocity weapon, and we'll create ammo and other pickups along with objects that respond when shot, and finally scripting a secret passage. Software required: Unreal Engine 4.7.2.
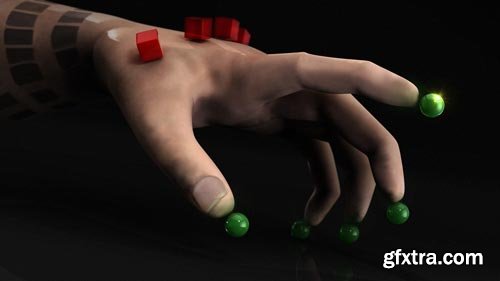
Rigging Hands in 3ds Max
MP4 | Video: 1280x720 | Duration: 2h 27m | Language: English
In this set of 3ds Max tutorials, we'll learn how to improve our control systems for hands in order to achieve more believable results. We'll start by learning where to position our bones for natural deformations. We'll then learn a technique for rigging knuckles and preserving volume in the hand overall. Finally, we'll enhance our rig by creating a system that will allow animators to switch between with IK and FK modes. By the end of this 3ds Max training, you will have the skills needed to rig hands more proficiently. Software required: Autodesk 3ds Max 2015.
Retargeting Mocap to Custom Rigs in CINEMA 4D
MP4 | Video: 1280x720 | Duration: 1h 8m | Language: English
- In this series of tutorials, we will learn a straightforward approach to transferring a motion-captured performance to a custom rig. We'll start by getting our source data ready for retargeting. We'll then learn what few modifications need to be made to our custom rig to get this to work. After this, we'll then learn how to connect our rig to follow the performance capture, as well as how to modify and clean up the animation afterwards. By the end of this course, you will have the skills needed transfer captured animation to your own rigs here in C4D. Software required: CINEMA 4D R16.
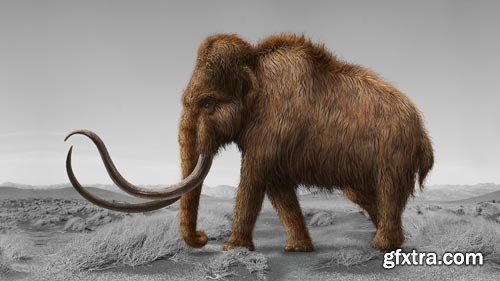
Resurrecting Extinct Creatures in Photoshop
MP4 | Video: 1280x720 | Duration: 2h 4m | Language: English
- In this Photoshop tutorial, we'll create a woolly mammoth using digital painting techniques and photo manipulation. These lessons will focus on the process of transforming an image of a real animal to create the illusion of a prehistoric creature by applying textures combined with painting. We'll begin by preparing the main image of an elephant by masking and cloning out any unwanted visual information. Next we'll use Liquefy to reshape portions of the elephant to feel closer to the proportions of a mammoth. From here we'll spend some lessons on blocking in hair textures, shadows, and painting additional hair to establish the woolly mammoth's furry coat onto the image of the elephant. Following this, we'll see how we can create the tusks for the mammoth by applying some textures and painting. Finally, we'll apply some last details to wrap up our project. By the end of this Photoshop training, you'll be able to find success with your own photo manipulation projects involving hair textures. Software required: Photoshop CC 2014.2.2
Responsive In-Browser Web Page Design with HTML and CSS
MP4 | Video: 1280x720 | Duration: 3h 22m | Language: English
- In this HTML and CSS tutorial, we'll learn how to create a responsive site from scratch by prototyping directly in the browser. We'll start with some boilerplate code and build on it with responsive images, videos, icons, maps, videos and off-canvas menus. By the end of this HTML and CSS training, you'll understand the in-browser responsive design creation process, from planning, to wireframing and prototyping, to the final product.

Rendering Realistic Interiors in 3ds Max and V-Ray
MP4 | Video: 1280x720 | Duration: 3h 27m | Language: English
- Throughout these lessons we will create high-resolution textures and complex, multi-layered shaders to add realism to our scene in 3ds Max and V-Ray. We will advance the lighting created in part one of this tutorial series, "Modeling Realistic Interiors in 3ds Max and Marvelous Designer", before breaking down individual models and areas of our scene. This will help add that extra detail needed to create an element of realism. We will also use Fusion 6 for the post-production stage to show how we can enhance our final render. By the end of this tutorial you will feel confident in creating complex materials and using the unwrap tools in 3ds Max to create something special. Software required: 3ds Max 2014, V-Ray 2.4, Fusion 6, Multitexture 2.0, Sapphire, Frischluft.
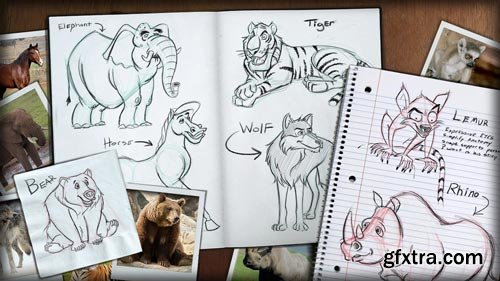
Sketching Appealing Animals in Photoshop
MP4 | Video: 1280x720 | Duration: 1h 40m | Language: English
- Capturing the appeal of any character than connects with an audience can be a real challenge especially when it comes to animals. In this tutorial we will reference a variety of animal images and explore how we can sketch appealing characters based on them. We'll begin each project by blocking out the form of the animal with simple shapes that will support their personality. Along the way we'll be considering various factors that can help develop appealing qualities of a character. Which each character we'll discover how we can exaggerate and humanize certain attributes that can connect and relate with an audience. After watching this training you'll be inspired to think differently about creatively designing your own animal characters with appeal. Software required: Photoshop CC 14.0.
Categories: GFXTRA Special » Special Fonts
Sketching and Rendering a Concept Illustration in Photoshop
MP4 | Video: 1280x720 | Duration: 4h 43m | Language: English
- Throughout these lessons, we will learn how to refine a rough automotive concept design sketch into a polished illustration in Photoshop. Using basic tools in Photoshop, elements from photographs and textures and logos, we will create a compelling design that shows off awareness of form and acknowledges function. By the end of this tutorial you will be able to effectively introduce light, shadow, and reflections that will bring flat ideas to life. Software required: Photoshop CS6.
Setting up a Jiggle System for Animation in 3ds Max
MP4 | Video: 1280x720 | Duration: 23m | Language: English
- In this 3ds Max tutorial, we'll learn how to set up a jiggle system for animation in 3ds Max. We'll start by learning how to create a jiggle system of our own. We'll then explore 3ds Max's Spring Controller, and learn how it can be used help animators save time when animating assets that require complex follow-through and overlapping actions. We'll also learn how to bake the animation, and safely remove the system when it's no longer needed. By the end of this 3ds Max training, you'll have the skills needed to set up a jiggle system of your own. Software required: Autodesk 3ds Max 2015.
Categories: Tutorials » Photography and Video
Sci-fi Digital Makeup Using Facial Tracking in After Effects
MP4 | Video: 1280x720 | Duration: 1h 30m | Language: English
- In this After Effects tutorial, we'll learn how to transform an ordinary human actress into an alien creature. We'll start off by tracking the face of the actress with the facial tracking system in After Effects. We'll then use that information to stabilize the face. Then, using Mesh Warp, we'll warp the face, beginning our alien transformation. We'll go over reversing the stabilization of the face and then move into Photoshop and create some textures to use in After Effects for digital makeup. Back in After Effects, we'll get the textures to move with the actor's face by using tracking data from the facial tracker. Finally, we'll learn some tricks on how to handle textures for heads rotating in 3D space. By the end of this After Effects training, you'll have created a very impressive-looking alien woman and learned some techniques you can start using right away to create a huge variety of digital makeup effects in your own projects. Software required: Adobe After Effects CC 2015, Adobe Photoshop CC 2015.
Rigging Human IK Characters for Mocap in Maya and Motion Builder 2016
MP4 | Video: 1280x720 | Duration: 1h 30m | Language: English
- Setting up characters is complex and subjective, and often unique to the particular character. Character rigging is one of the least understood areas of animation, even for expert Maya artists. Getting good character rigging results takes practice and commitment. In this course, Rigging Human IK Characters for Mocap in Maya and Motion Builder 2016, you will be using both Maya and MotionBuilder 2016 to rig a human character using HumanIK controls. After discovering how to complete the initial rigging, you will learn how to apply motion capture data, and you'll also learn how to begin testing and refining the character's rigging and weight mapping. After viewing this course, you will have a solid understanding of rigging using Autodesk HumanIK controls, and you will be able to apply motion capture data easily to your own rigged characters. Software required: Maya 2016, MotionBuilder2016.
Retouching Techniques for Photographers in Photoshop
MP4 | Video: 1280x720 | Duration: 3h 50m | Language: English
- In this Photoshop tutorial, we'll learn some advanced photograph retouching techniques. We'll start by removing some wires from the sky. From there, we'll tackle a variety of challenges that many photo retouching projects encounter such as removing buildings, comping in another photo to help add believability to the background, color correcting certain areas and cleaning up anything that might detract from the photo without making it appear as if it was edited. By the end of this Photoshop training, you'll have tips and techniques you'll need to be able to tackle your own photo retouching projects
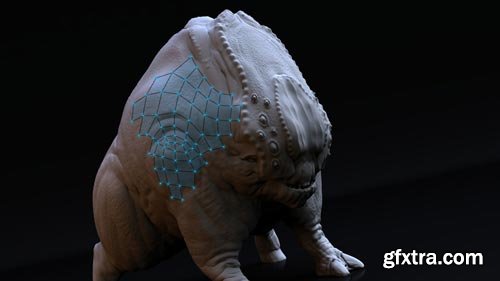
Retopology Techniques in CINEMA 4D
MP4 | Video: 1280x720 | Duration: 1h 53m | Language: English
- In this CINEMA 4D tutorial, we'll learn the ins-and-outs of the Polygon Pen and see it in action as we go through the process of creating a more optimized mesh for a sculpted creature. The topology, or edge flow of our polygon meshes is important as we create our 3D projects. Good topology can mean fewer overall polygons are needed to reflect the detail we want. Good edge flow is also important when creating final meshes that require animation. The Polygon Pen in CINEMA 4D is a great all-around tool for quickly creating and modifying a mesh's topology. When combined with snapping, we can create new polygons directly on top of our high resolution meshes. These meshes could be sculpts you've done in CINEMA 4D or work that you bring in from other applications like ZBrush. By the end of this CINEMA 4D training, you'll have a greater understanding of overall topology concepts, as well as some great skills for optimizing the mesh on sculpted creatures. Software required: CINEMA 4D R16.
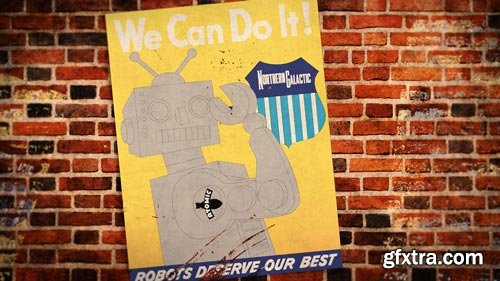
Recreating Retro Typefaces for Logos in Illustrator
MP4 | Video: 1280x720 | Duration: 2h 21m | Language: English
- The ideal course for designers and artists who already have some basic knowledge of Adobe Illustrator, and want to create game or mapping assets using their imagination and retro public domain images from WWII era posters and logos. Viewers will gain insight on how to take a client's vision and execute it to it's completion and have a completed project under their belt. In this course, we cover how Adobe Illustrator can help you recreate vector headline art and, by the end, you'll be able to use these techniques on any similar logo project you have in mind for use in 3D mapping, 3D extrusion, websites, apps, or print. Software required: Adobe Illustrator CC.

Rebranding Workflows in Illustrator and Photoshop
MP4 | Video: 1280x720 | Duration: 1h 44m | Language: English
- It's difficult enough to design an identity for a new company, but when you're tasked with redesigning an identity for an established company, the challenge is even more difficult at times. This is because you have to create something new and exciting, while also preserving a sense of the business that customers have come to know. In this course, Rebranding Workflows in Illustrator and Photoshop, you're going to discover how to solve this issue by intelligently dissecting the current identity address its weaknesses, and improve on it by creating a new brand identity. First, you will learn the basics of branding and how an identity fits within a brand. You will also discover if a rebranding is even necessary. Next, you will think through the workflow of what to do while you're rebranding, both before the change and after. Finally, you will become familiar with a rebranding process by following along with a full rebranding project for a fictional business. By the end of the course, you will have a solid understanding of the concepts of rebranding and how to rebrand an identity. Software required: Photoshop CC 2015 and Illustrator CC 2015.
Real-Time Aging and Decay for Games in UDK and Photoshop
MP4 | Video: 1280x720 | Duration: 2h 49m | Language: English
- In this tutorial we will discuss creating a damaged and worn asset from a new asset and control a real-time transition between the two states. Condition, damage, and aging of materials is important to understand for each asset an artist makes. Not only should they understand how the object was created when new, but also how the build-up of wear and damage will effect the objects surfaces and edges. By the end of this training you should have a better understanding how to approach creating aged and decayed assets for games. Software required: UDK(2012-10),Photoshop CS5, Maya 2012, Ndo2, xNormal, ZBrush 4R4 .
Quick Start to After Effects: Volume 5
MP4 | Video: 1280x720 | Duration: 1h | Language: English
- Welcome to Volume 5 of the Quick Start to After Effects, a series of specially constructed courses meant to be followed in sequence and interspersed with valuable exercises to reinforce learned concepts. In this volume, we'll focus on rendering, which is the process of getting your video out of After Effects to watch on your computer or take it into another program for more post production work. We start out with focusing on the specific type of render that you would want to create if you were going to do more work in post. Then, we move onto a more simple render format, that you can use to watch on your computer or for uploading to the web. After we go over those types of renders, we talk about ways to streamline your project and how to collect your files to keep all your assets in one place for better organization. These courses are designed to be taken in sequence so we really encourage you to start with Volume 4 before continuing with this section. We also encourage you to take advantage of the assignments that follow each volume. These assignments will allow you to take what you've learned and apply those tools and techniques to your own projects. Software required: After Effects CC v. 12.0.0.404.
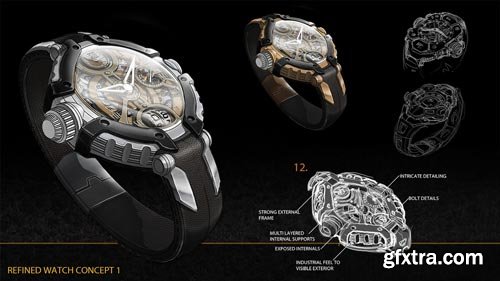
Product Design Pipeline: Concepting a Watch in Photoshop
MP4 | Video: 1280x720 | Duration: 4h 27m | Language: English
- Throughout this Photoshop tutorial we'll create multiple concept designs for a consumer product that will take the form of a watch. We'll choose one of our sketches and refine it to a level where it can be presented as a final product design. We'll also create additional detailed sketches to create a comprehensive guide for us to model the watch in Rhino in the future. By the end of this Photoshop training, you'll have a better understanding of how the concept design portion of industrial and consumer product design works. Software required: Photoshop CS5.1, Rhino 5.
Categories: Tutorials » Photography and Video
Product and Packaging Visualization in CINEMA 4D and After Effects
MP4 | Video: 1280x720 | Duration: 3h 28m | Language: English
- In this series of tutorials, we will go through the process of creating a product visualization animation complete with text explaining the benefits of the product. This product also includes its packaging, which can create some unique challenges when trying to show off the product itself. We'll learn how to make this work for us and then how to bring this inanimate object to life. We'll use Cloners and our own personal hierarchy controls to create lots of fun and interesting arrangements of the product. After we finish animating, we learn how we can set up lights and cameras to use as placeholders. We use these with the "extract" function in the CINEWARE effect in After Effects. They will keep position and rotation keys for us to use with the text that we later want to add to the composition. After all the text and icons have been added to the comp, we finish off with a few realistic lens effects. This training is for you if you want to create product visualizations with text interactions and learn more about the powerful CINEWARE bridge between After Effects and CINEMA 4D. Software required: CINEMA 4D R15, After Effects 12.2.0.52, Knoll Light Factory.
Post-processing and Cinematic Effects in UDK
MP4 | Video: 1280x720 | Duration: 1h 24m | Language: English
- Throughout these lessons, we will discuss using camera actors to shape player experience and also discuss techniques similar to those used in films. Camera actors control the view the player has at all times and portray the events in the game. Many current generation games use cinematic tricks and techniques to sell the believability of the action and game play. By the end of this training, you should feel more comfortable adding post-processing and cinematic Eeffects in UDK. Software required: UDK (2012-10), Photoshop CS6.
Top Rated News
- Sean Archer
- AwTeaches
- Learn Squared
- PhotoWhoa
- Houdini-Course
- Photigy
- August Dering Photography
- StudioGuti
- Creatoom
- Creature Art Teacher
- Creator Foundry
- Patreon Collections
- Udemy - Turkce
- BigFilms
- Jerry Ghionis
- ACIDBITE
- BigMediumSmall
- Boom Library
- Globe Plants
- Unleashed Education
- The School of Photography
- Visual Education
- LeartesStudios - Cosmos
- All Veer Fancy Collection!
- All OJO Images
- All ZZVe Vectors
