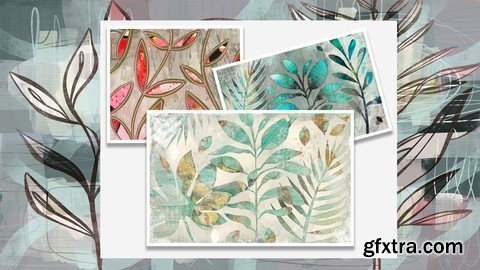
In this class we will be exploring mixed-media illustration in Procreate even more. We start by creating an interesting background in much the same way as you would do it in an art journal. We build it up, layer by layer, adding plenty of texture and interest. I show you many examples of work that I have been doing so you can begin to understand the outcomes. I add many different details like ephemera I have created or purchased. Throughout, I show you methods for creating depth with shadows. Another objective I had was in showing you how to make all sorts of adjustments, so there are many, many examples and walk-throughs of doing just that. We adjust things like hue and saturation, blending modes, and I show you tips and tricks with filters like liquefy and gradient map. With gradient map I show you how to remove color from an original watercolour to make a cool background. On the list of outcomes, I also include the skill of knowing when to use clipping masks and alpha lock to add details, and why these are so useful. Adding a certain amount of grunge is truly what makes mixed media art so satisfying and making and alpha lock make it so very easy. The last couple of lessons focus on fine-tuning and adding the little details that truly make this a traditional mixed-media piece. The last lesson shows a bunch of time-lapses (with narration, of course), that show all of the steps we went through in class in the several documents I worked on. It is really revealing! This is the 5th class in a series of classes in which I teach you all about mixed media and negative space painting techniques. I recommend that you take the time to work through all the classes if you are serious about mixed media. You will learn all there is to learn about making ephemera and texture brushes and working with these shapes, textures and finishes. Each class offers a different perspective. The other classes in the series are: · Ephemera to Make Brushes for Mixed Media Art in Procreate · Clone Tool for Constructing Seamless Repeat Patterns in Procreate · Serene Forest Watercolour Negative Space in Procreate · Jungle Fever Advanced Layering & Brush Methods in Procreate In this class I’ll walk you through: · creating a mixed media background · adding ephemera including sourcing and importing · adding painted details and outlines · tips for creating compositions for a varied and appealing layout using the background brushes If you’re an eager mixed media artist hoping to switch to digital, and you have a good basic knowledge of Procreate, you’ll be able to go through all the steps. This class will benefit anyone who is looking for attainable processes to spice up any layout or background.

Peekaboo_Mixed_Media_Techniques_w_Procreate_Brushes_Included.part2.rar
Top Rated News
- Sean Archer
- AwTeaches
- Learn Squared
- PhotoWhoa
- Houdini-Course
- Photigy
- August Dering Photography
- StudioGuti
- Creatoom
- Creature Art Teacher
- Creator Foundry
- Patreon Collections
- Udemy - Turkce
- BigFilms
- Jerry Ghionis
- ACIDBITE
- BigMediumSmall
- Boom Library
- Globe Plants
- Unleashed Education
- The School of Photography
- Visual Education
- LeartesStudios - Cosmos
- All Veer Fancy Collection!
- All OJO Images
- All ZZVe Vectors


