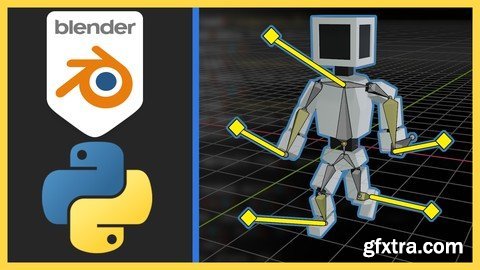
Keyframe Animation With Python & Blender
MP4 | Video: h264, 1280x720 | Audio: AAC, 44.1 KHz
Language: English | Size: 1.47 GB | Duration: 2h 23m
What you'll learn Basic concepts about keyframe animations like keyframes and interpolation Create a basic animation in Krita to then export the animation data to a json file Use Tensorflow JS with PoseNet to read the poses of a human body from a multimedia file Create a Python script that reads the pose data to create animated armature to recreate the source material. Execute the script in the scripting section provided by Blender Requirements You must be familiar with scripting; however, anyone can follow it as each step is explained. Blender v 3 and above Visual Studio Code. This is optional since Blender provide his own editor Krita 5 Pre-trained TensorFlow JS models Description Hello and welcome.If you are a designer or developer who is interested in create pose-to-pose animations in a 3D environment with the possibilities to automate the process, this course is for you.This course focuses on creating multiple Python scripts that will help us to read pose information from external sources like pictures and video and use it to create an animated armature.For this, we will mainly use Blender as the 3D Editor and Python to create the scripts.With Python, we will read JSON files that contains information about the positions of the limbs and time marks that can help us to identify keyframes.With Blender, we will run the script to create an armature with an animation that recreate the poses from the original source.We will also use Krita and Tensorflow to get the pose information that we will be using through the course.You may like this course because it can help you save time when you want to create 3D animations.In addition, you will have access to the content created during the course.I hope you find the content useful and that you can apply it to your personal projects.Have fun and happy learning.In this course you will learn:Basic concepts about keyframe animations like keyframes and interpolationCreate a basic animation in Krita to then export the animation data to a json fileUse Tensorflow JS with PoseNet to read the poses of a human body from a multimedia fileCreate a Python script that reads the pose data to create animated armature to recreate the source material.Execute the script in the scripting section provided by BlenderYou will require:You must be familiar with scripting; however, anyone can follow it as each step is explained.Blender v 3 and aboveVisual Studio Code. This is optional since Blender provide his own editorKrita 5Pre-trained TensorFlow JS models Overview Section 1: Introduction Lecture 1 Introduction Lecture 2 Data source Lecture 3 Basic concepts Lecture 4 Software Section 2: Manual pose data from Krita Lecture 5 Introduction Lecture 6 Importing the reference Lecture 7 Creating pose-to-pose animation Lecture 8 Copy data to a json file Lecture 9 Get the rest of the information Section 3: Coding the data reader Lecture 10 Introduction Lecture 11 Loading the json files Lecture 12 Creating the bones Lecture 13 Executing the code in Blender Section 4: Adjusting the code Lecture 14 Introduction Lecture 15 Size and position Lecture 16 Executing the changes. Pt 1 Lecture 17 Controls and Inverse kinematic Lecture 18 Executing the changes. Pt 2 Lecture 19 Animation Lecture 20 Executing the changes. Pt 3 Section 5: Getting pose data from Tensorflow Lecture 21 Introduction Lecture 22 Videos for the poses Lecture 23 Installing examples Lecture 24 Modifying pose detection example Lecture 25 Using the example Lecture 26 JSON File Section 6: Reading the Tensorflow data Lecture 27 Introduction Lecture 28 Loading the json files Lecture 29 Creating the center bones Lecture 30 Rearranging the source data Lecture 31 Creating bones with custom function Lecture 32 Creating the rest of the bones Lecture 33 Code fix Lecture 34 Executing the changes. Pt 1 Lecture 35 Correcting the bone positions Lecture 36 Executing the changes. Pt 2 Section 7: Animating the armature Lecture 37 Introduction Lecture 38 Creating controller with custom function Lecture 39 Creating the controllers Lecture 40 Creating IK with custom function Lecture 41 Creating the IK Lecture 42 Creating position keyframes with custom function Lecture 43 Creating the position keyframes Lecture 44 Executing the changes. Pt 1 Lecture 45 Animating the center of the body Lecture 46 Executing the changes. Pt 2 Section 8: Creating the armature Lecture 47 Introduction Lecture 48 Base structure Lecture 49 Bone Names Lecture 50 Assigning a model. Pt 1 Lecture 51 Assigning a model. Pt 2 Section 9: Reusing a Blender armature Lecture 52 Introduction Lecture 53 Reading data from the scene Lecture 54 Executing the changes. Pt 1 Lecture 55 Adapting the existing data. Pt 1 Lecture 56 Adapting the existing data. Pt 2 Lecture 57 Adapting the existing data. Pt 3 Lecture 58 Getting the original pose Lecture 59 Executing the changes. Pt 2 Section 10: Adjusting the armature and animation Lecture 60 Introduction Lecture 61 Angle. Pt 1 Lecture 62 Angle. Pt 2 Lecture 63 Rotation Lecture 64 Rotation Keyframe Lecture 65 Interpolation Section 11: Animated Model Lecture 66 Articulated doll poses Lecture 67 Camera recording poses Section 12: Final Message Lecture 68 Final Message 3D designers or programmers who want to automate tasks to create complex 3D animations.
Top Rated News
- Sean Archer
- AwTeaches
- Learn Squared
- PhotoWhoa
- Houdini-Course
- Photigy
- August Dering Photography
- StudioGuti
- Creatoom
- Creature Art Teacher
- Creator Foundry
- Patreon Collections
- Udemy - Turkce
- BigFilms
- Jerry Ghionis
- ACIDBITE
- BigMediumSmall
- Boom Library
- Globe Plants
- Unleashed Education
- The School of Photography
- Visual Education
- LeartesStudios - Cosmos
- All Veer Fancy Collection!
- All OJO Images
- All ZZVe Vectors


